My Ubiquiti USG (Unifi Security Gateway) stopped working one day, this took down the whole network as it was the router / dhcp server.
Changing the VDSL2 modem from bridge mode was a saviour for a little. But I needed to find out what happened to the USG. One amazon order later.
What you need
Cisco compatible Console Cable - Amazon Link (Moyina USB Console Cable USB to RJ45 Cable Essential Accesory of Cisco, NETGEAR, Ubiquity, LINKSYS, TP-Link Routers/Switches for Laptops in Windows, Mac, Linux (Blue))
Donor USB Key - Used a simple 32GB one I had lying around
Steps
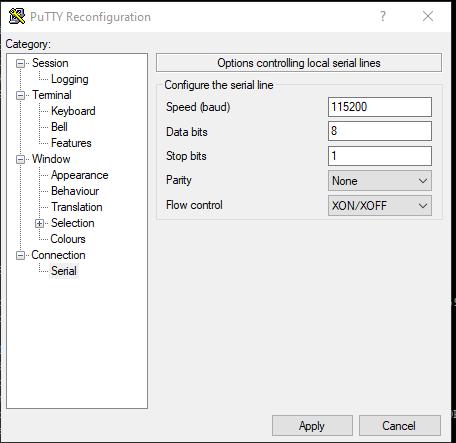
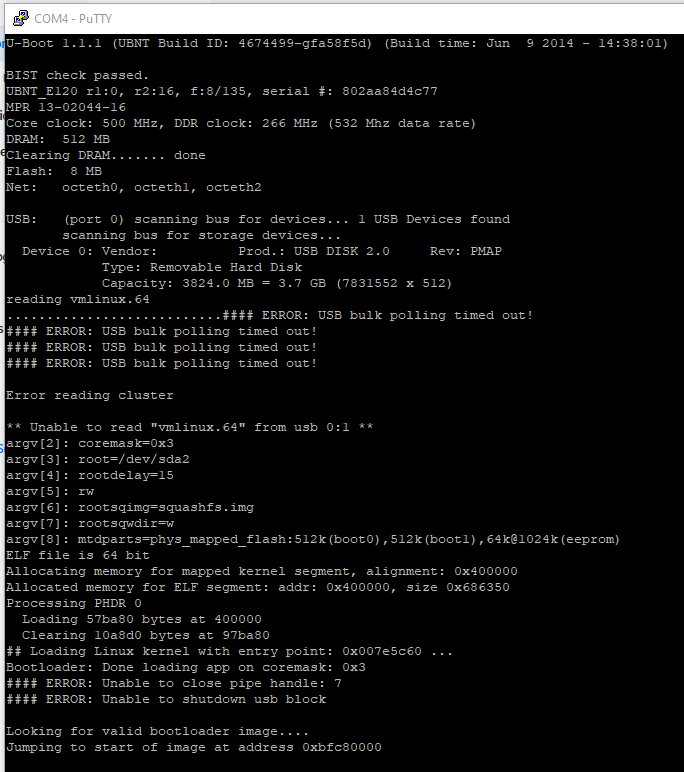
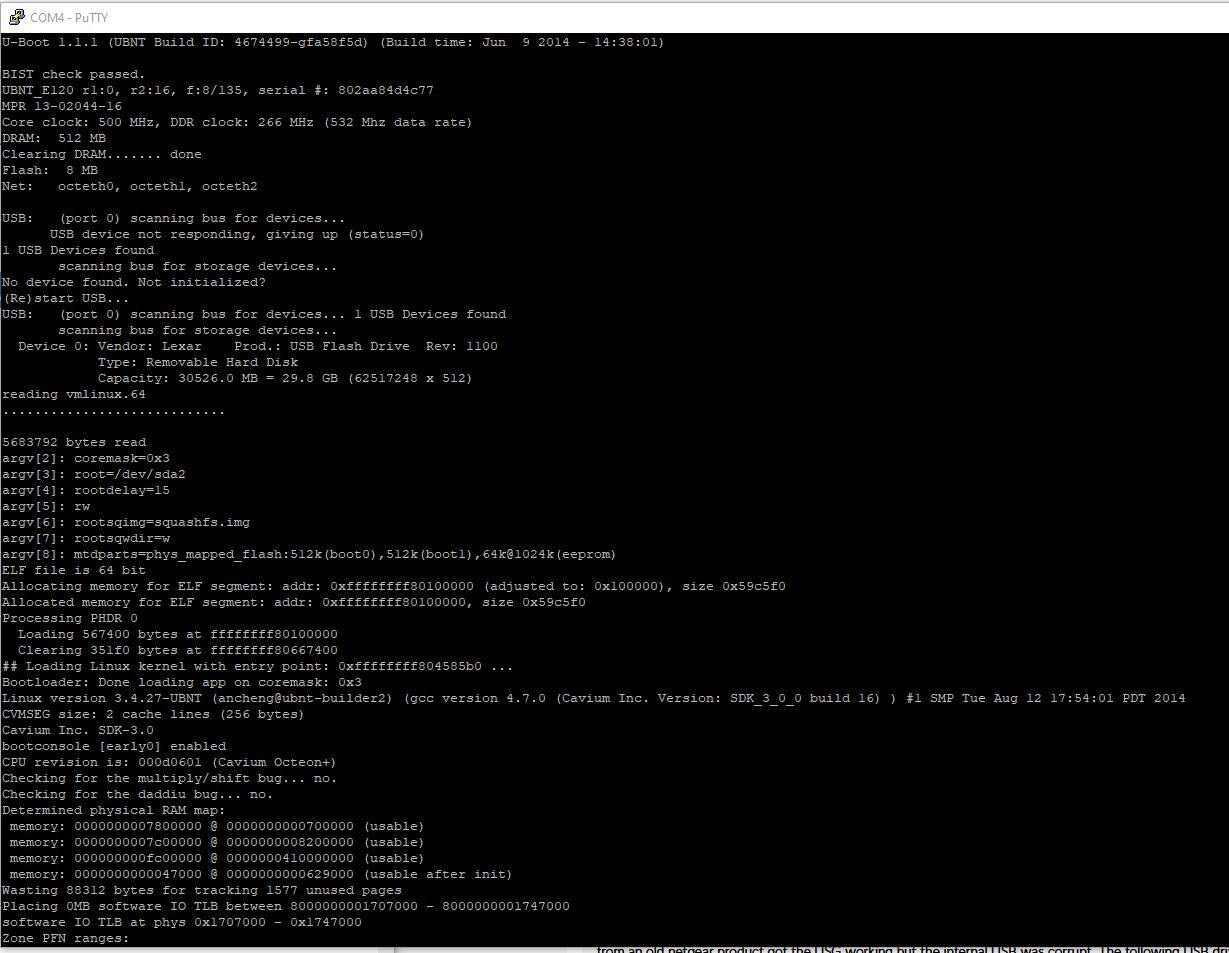
Connect Console Cable. Use Putty. Connect with speed of 115200. Find the COM port by viewing Device Manager after plugging in the cable. Boot the device and read. Look at the error. USB Bulk polling timed out sounds like the USB key is not happy.
Download the original firmware from Ubiquiti - https://dl.ubnt-ut.com/cmb/USG-4_2_0-shipped.img.bz2 (note from future me, after you do this, then manually upgrade to the newer version of the firmware manually, see below)
Extract the firmware until you have just the .img file
Use Rufus to burn the img file to the donor USB
Remove the old USB
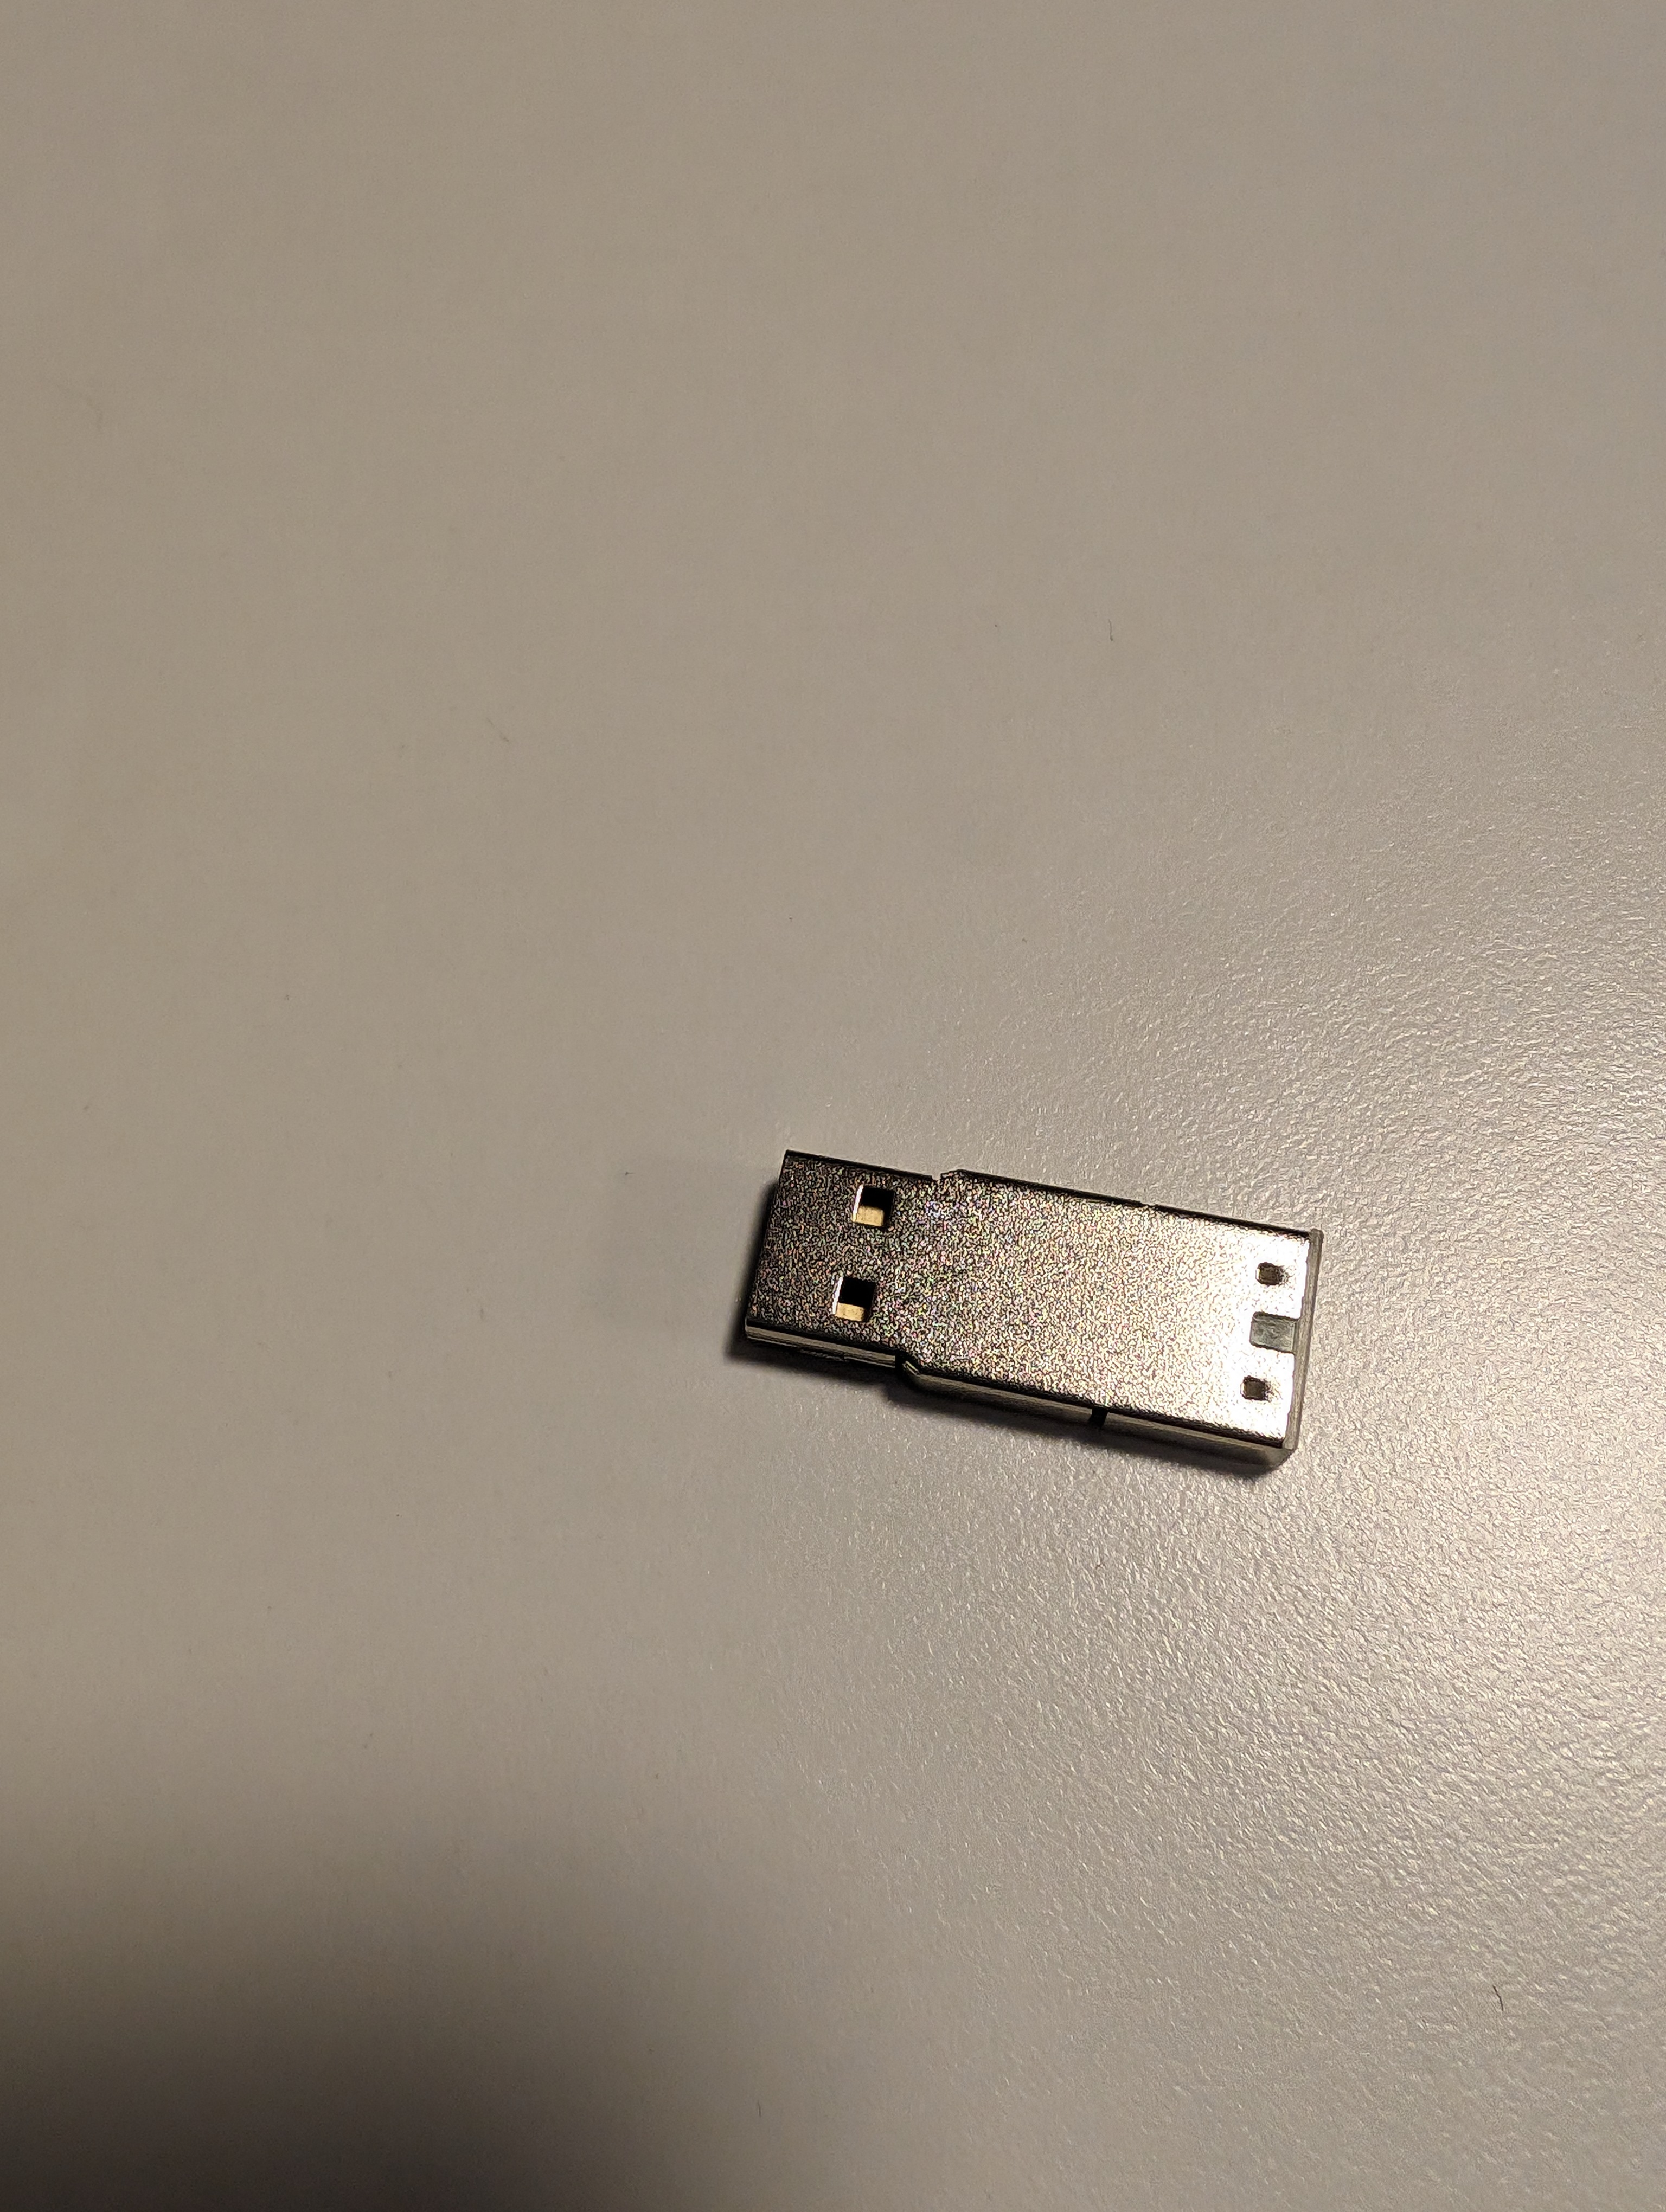
Rip the housing off the new donor USB so it is just the usb plug / chips, need to do this as it wont fit in the case otherwise. Plug in the new USB. Boot.
If you get a error about not finding the USB, there is a command we can set to wait 3 seconds and try again. Some USB keys need a little more time to turn on. Big thanks to this thread on the Ubiquiti forum, thanks jannieh.
You will need to run the following commands. Frist a printenv to find the bootcmd command and then you want to add before the bootcmd sleep 3;usb reset;
Put it back together. Place it in your network and boot it up while plugged in to the network.
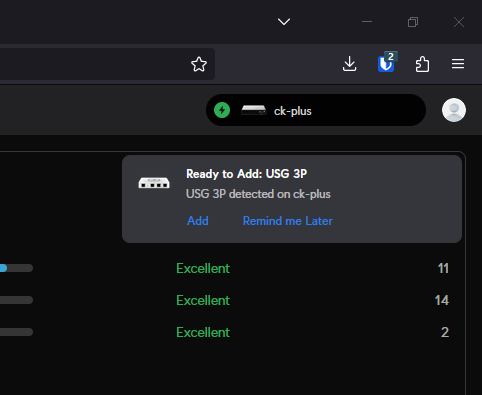
In the Ubiquiti Network application you should see a "ready to add USG 3P"It may fail, use advanced adoption - Device Username / Password. Defaults are ubnt / ubnt. In my case, the USG decided to use the same IP as my modem. So I had to unplug my modem and then adopt it. Upgrade it as well as it has a really old version of firmware (as we downloaded the original version).
And then spend a whole bunch of time not getting it to adpot... eventually the only thing which worked was MANUALLY updating the firmware to the latest version and adopting then. I think the issue was related to the old version and the new network application not being able to adopt it. Follow the USG (No Internet) options. Along with the issues of having my USG on a cutsom IP.

Please Leave Comments